
Translate or Change the Upload Field's Text
Translate or rename the No file chosen and Choose File text on your Uploadery upload field to match your store language or wording.
Wondering how you can translate or change your upload field’s text, No file chosen or Choose File?
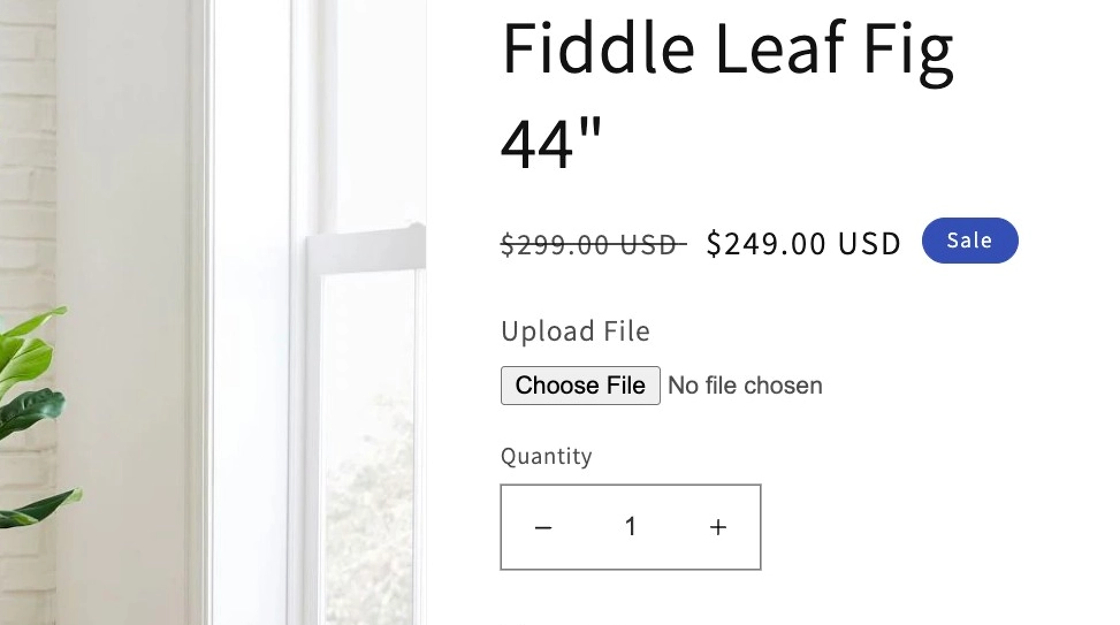
Translate or Change the Upload Field’s Text
Section titled “Translate or Change the Upload Field’s Text”If you’d like to change or translate the text that appears on your upload button, you can customize this through your theme.
Uploadery does not have a built-in setting to directly change the default input text, but you can update it through your theme by following these steps:
How to Customize the Upload Button Text
Section titled “How to Customize the Upload Button Text”- From your Shopify admin, go to Online Store → Themes.
- Find the theme you want to edit, click Actions → Edit code.
- Open
product.liquidin the Templates folder.
If your theme usesproduct.json, openmain-product.liquidin the Sections folder instead. - Add this script to the bottom of the file:
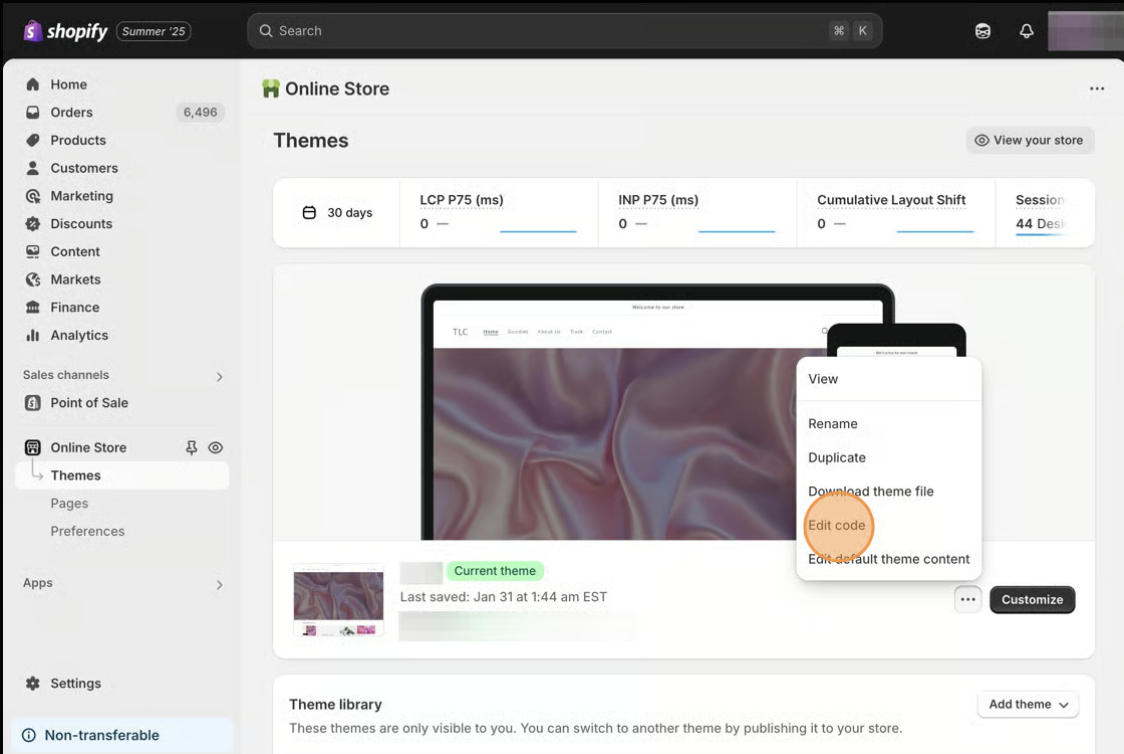
- From your Shopify admin, click Online Store, then click Themes.
- Find the theme you want to edit, click the Actions button, then click Edit code.
- Navigate to the
product.liquidfile within the Templates folder.
If your theme does not have aproduct.liquidfile and instead has aproduct.jsonfile, locate a file calledmain-product.liquidin the Sections folder. - Paste the following code snippet at the bottom of the file:
<script> Shoppad.$(function() { Shoppad.$(document).on('uploadSuccess', 'form[data-uploadery]', function(e) { $(e.target).addClass('upload-complete'); }); });</script>- Locate your theme’s main CSS file by following the instructions in this article.
- Paste the following CSS at the bottom of your stylesheet:
#uploadery-container input[type=file] {  width: 0.1px;  height: 0.1px;  opacity: 0;  overflow: hidden;  position: absolute;  z-index: -1;}
#uploadery-container input[type=file]:active {  outline: none;}
#uploadery-container label > div {  width: 100%;  height: 40px;  cursor: pointer;  border: 1px solid #ececec;  background-image: url('data:image/svg+xml;base64,PD94bWwgdmVyc2lvbj0iMS4wIiBlbmNvZGluZz0idXRmLTgiPz4NCjwhRE9DVFlQRSBzdmcgUFVCTElDICItLy9XM0MvL0RURCBTVkcgMS4xLy9FTiIgImh0dHA6Ly93d3cudzMub3JnL0dyYXBoaWNzL1NWRy8xLjEvRFREL3N2ZzExLmR0ZCI+DQo8c3ZnIHZlcnNpb249IjEuMSIgaWQ9IkxheWVyXzEiIHhtbG5zPSJodHRwOi8vd3d3LnczLm9yZy8yMDAwL3N2ZyIgeG1sbnM6eGxpbms9Imh0dHA6Ly93d3cudzMub3JnLzE5OTkveGxpbmsiIHg9IjBweCIgeT0iMHB4Ig0KCSB2aWV3Qm94PSIwIDAgNjQgNjQiIGVuYWJsZS1iYWNrZ3JvdW5kPSJuZXcgMCAwIDY0IDY0IiB4bWw6c3BhY2U9InByZXNlcnZlIj4NCjxnPg0KCTxnPg0KCQk8Zz4NCgkJCTxwb2x5Z29uIHBvaW50cz0iMzQsNTAgMzAsNTAgMzAsNy40IDE3LjcsMTguNSAxNSwxNS41IDMyLDAuMiA0OSwxNS41IDQ2LjMsMTguNSAzNCw3LjQgCQkJIi8+DQoJCTwvZz4NCgk8L2c+DQoJPGc+DQoJCTxnPg0KCQkJPHBvbHlnb24gcG9pbnRzPSI2MSw2NCAzLDY0IDMsMjQgMjIsMjQgMjIsMjggNywyOCA3LDYwIDU3LDYwIDU3LDI4IDQyLDI4IDQyLDI0IDYxLDI0IAkJCSIvPg0KCQk8L2c+DQoJPC9nPg0KPC9nPg0KPC9zdmc+DQoNCg==');  background-size: 30px 30px;  background-repeat: no-repeat;  background-position: 2% center;  text-align: center;  line-height: 42px;}
#uploadery-container .uploaderyProgressBar {  display: block;  float: none;  width: 100% !important;  height: 100%;  max-width: none;  clear: none;}
#uploadery-container .uploadery-temporary {  height: 100%;}
#uploadery-container .uploaderyProgressBar span {  border-radius: 0;}
#uploadery-container .uploaderyIsUploading > div:after {  content: '';}
#uploadery-container label > div:after {  content: "Upload File";}
#uploadery-container .upload-complete label > div:after { content: "Upload Complete!";}- From Step 6, locate the last two blocks of CSS and update the text inside the quotes with your preferred wording:
#uploadery-container label > div:after {  content: "Upload File";}
#uploadery-container .upload-complete label > div:after { content: "Upload Complete!";}- Save your changes and preview your product page.